
Introduction
Keeping your data well-organized is key when working with MS Excel. This is especially true for text alignments. Misaligned text can cause confusion, decrease the readability of the user, and can eventually lead to errors.
This is why we give you below a brief article on how to align text in MS Excel properly and which different methods are best practices to improve the clarity of your files and presentation.
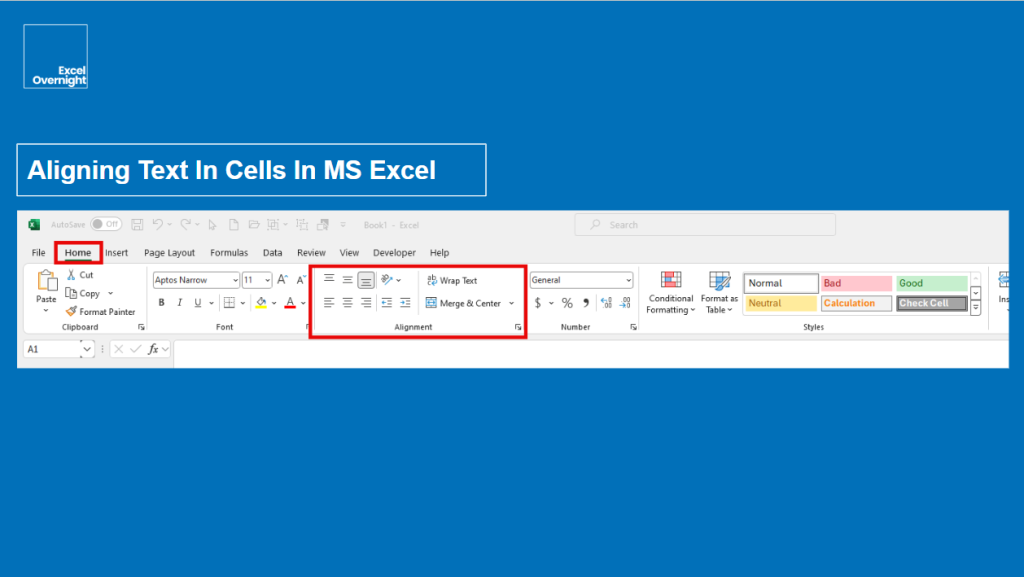
To align text in cells in MS Excel you can find the options in the alignment group in the home tab of the Excel ribbon.

Understanding Cell Alignment in Excel
Explanation of Default Alignment:
The default alignment is on the left for numbers and alphanumeric data (numbers and letters in one field). For text (string, letters) the default alignment is on the right side. Center alignment is not a default alignment, so if you want some cells to align the center, you need to format the cells accordingly.
A proper alignment of your data in the Excel sheet is vital. Otherwise, your sheet will be messy and give the user a hard time.
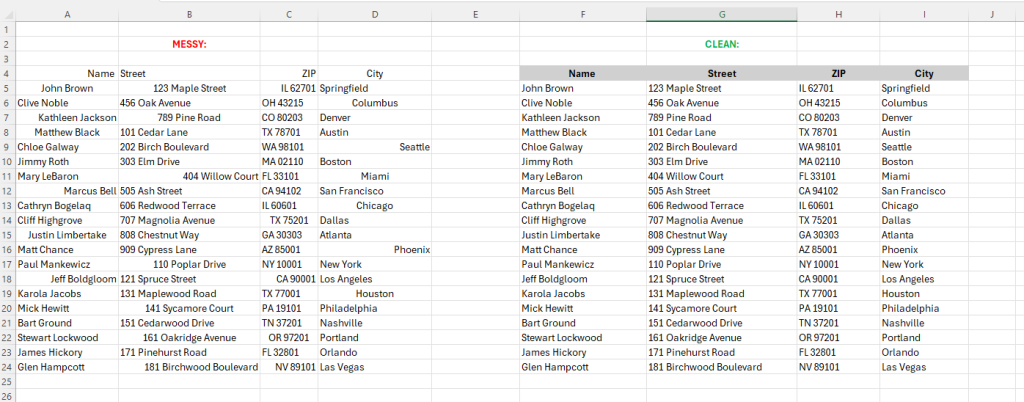
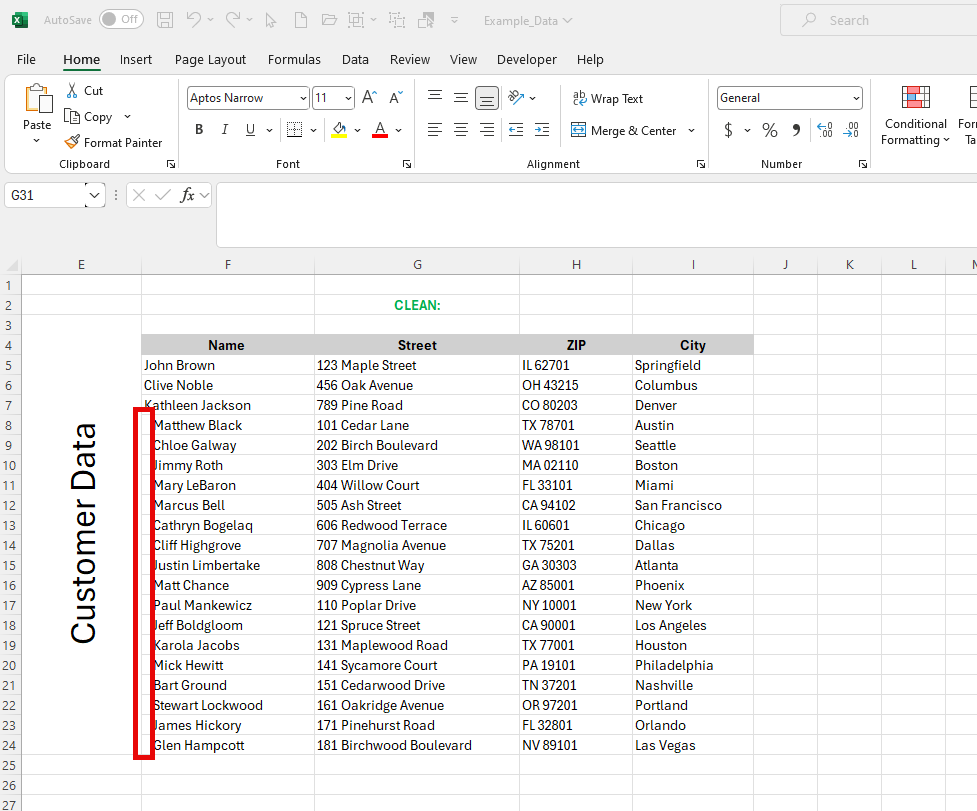
See what I mean in the picture below. On the left side: messy, not aligned properly. On the right side: clean, aligned properly.
Why Alignment Matters:
In the above example are only random addresses. Even with the messy alignment on the left side, data are somehow clear, and there shouldn’t be any error when the user interprets the data. It is not nice, but somehow readable.
But in reality, you work with large data sets where the data are not always clearly interpretable. Think of economic and scientific data sets. Many interpretation errors can be made when your cell entries aren’t properly aligned.
Furthermore, it is a matter of respect to design your worksheet with good aesthetics for better user experience and data transparency.
Basic Alignment Options
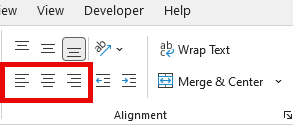
Horizontal Alignment:
The default alignment for text is left aligned. And in most cases, this makes sense, due to the reader’s eye typically goes from left to right (except with Arabic and some other languages).
A center alignment is typically used for headings.
Right alignments are mostly used for numbers. When you align the numbers on the right, then your eye has a better visualization of the number’s scale and decimals.
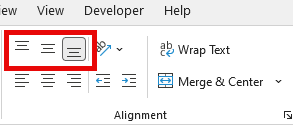
Vertical Alignment:
Vertical alignment of cells in MS Excel can improve readability, especially when a cell contains multiple lines of text or wraps text. But make sure to align data consistently. Don’t switch alignment when it doesn’t make sense.
For the Title or Header rows, you can make them stand out and appear more balanced when aligning them top, middle, or bottom.
A useful use case is combining text with graphics or images. Then you should always align your text properly to keep a good design. Furthermore, a typical use is in forms with input fields. Centering cells in data-heavy spreadsheets does also a good job. You can make the presentation more structured and easier to read and analyze. Merged cells can also be positioned as desired, either at the top, middle or bottom of the merged space.
Advanced Alignment Techniques
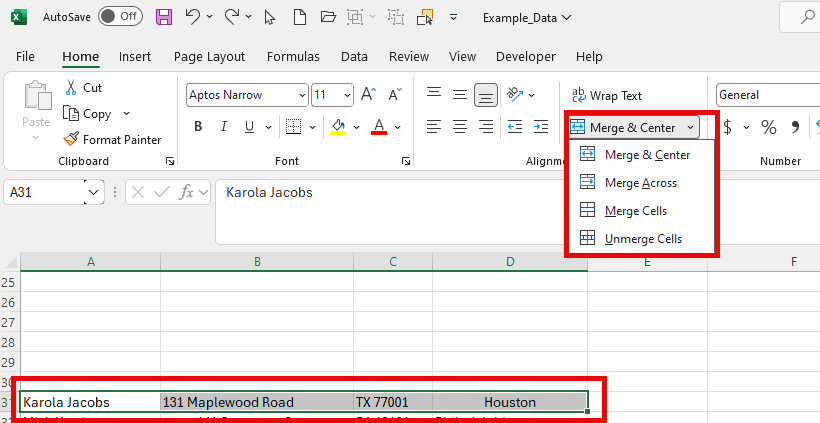
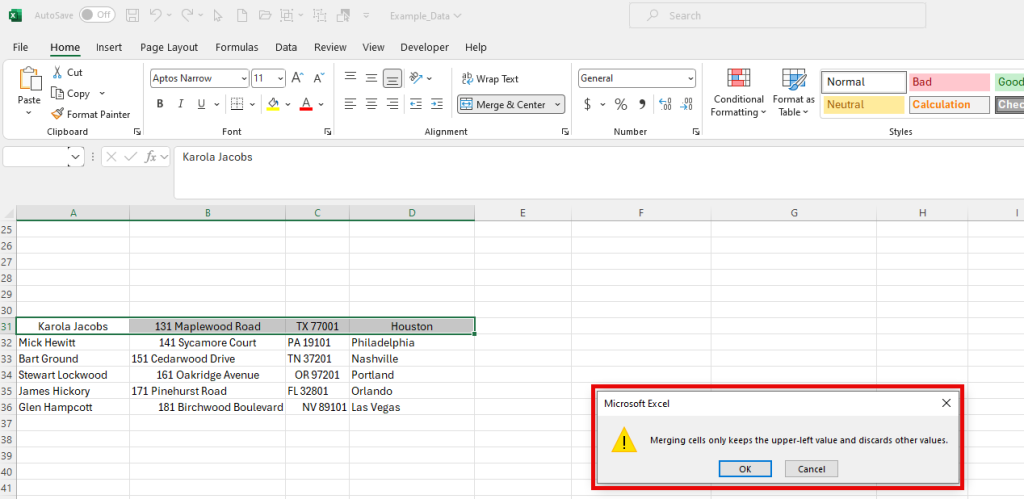
Merge & Center:
When you merge and center multiple columns and/or rows, only the data of the first column/row will be taken over. MS Excel will warn you with a popup window:
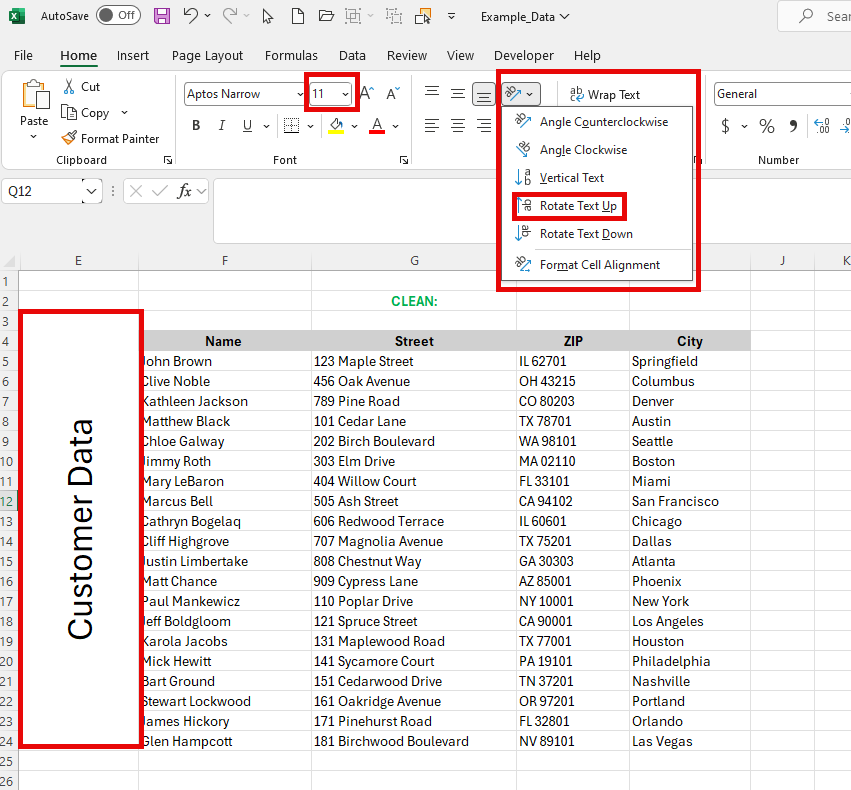
Text Rotation:
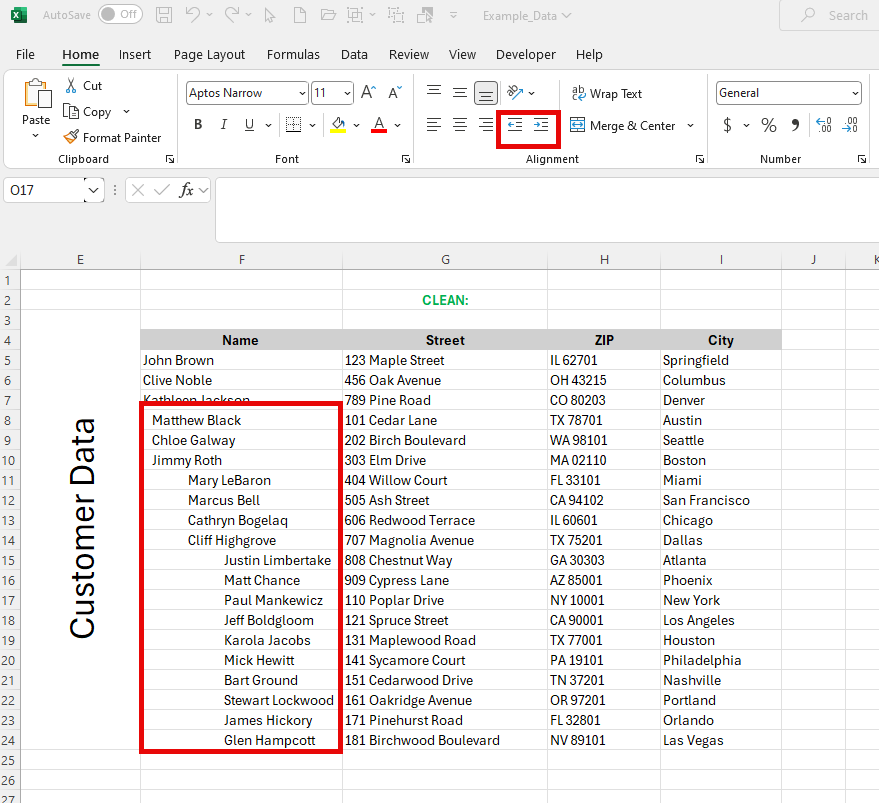
Sometimes it makes sense to rotate your text for better design and usability of your spreadsheet. There are different options in the alignment group. You should test them out on your own. In the example below we first merged the cells e3 to e24. Then we put “customer data” into the cell, adjusted the text size from 11 to 28, and used the functionality “Rotate Text Up”.

Indentation:
When you want to create a kind of hierarchical structure in your rows or for aesthetic reasons you can indent text as well.
Simply mark the rows you want to indent and use the “increase indent” icon or if you want to redo it the “decrease indent” icon.
In our example below we marked the cells f8 to f24 and indented them once.
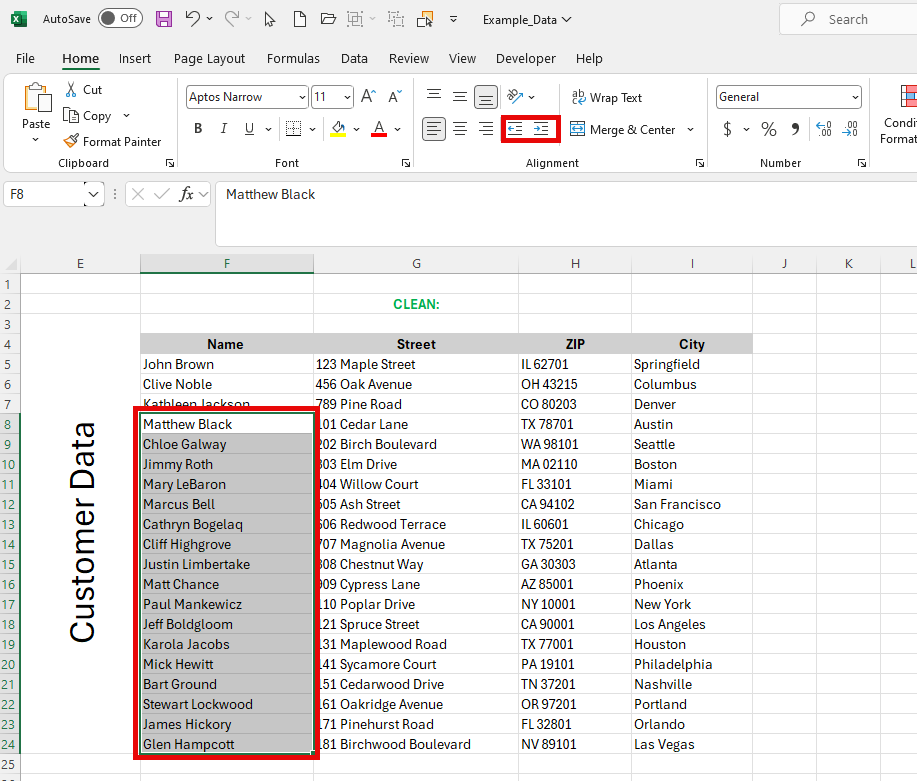
You can do this multiple times to indent them further or build a hierarchy by indenting other rows a little further as well.
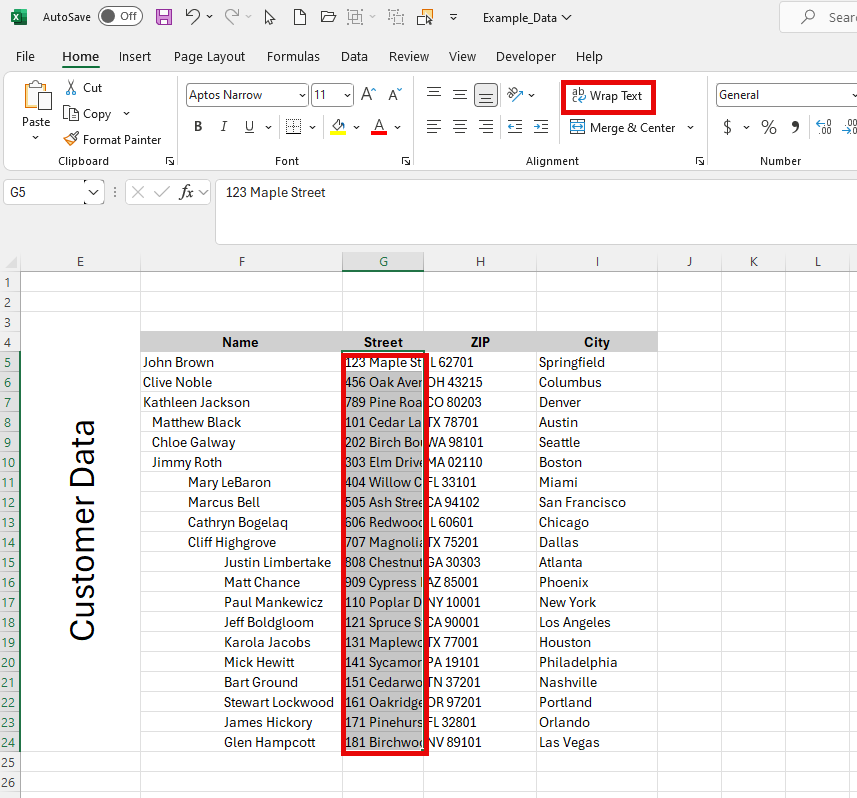
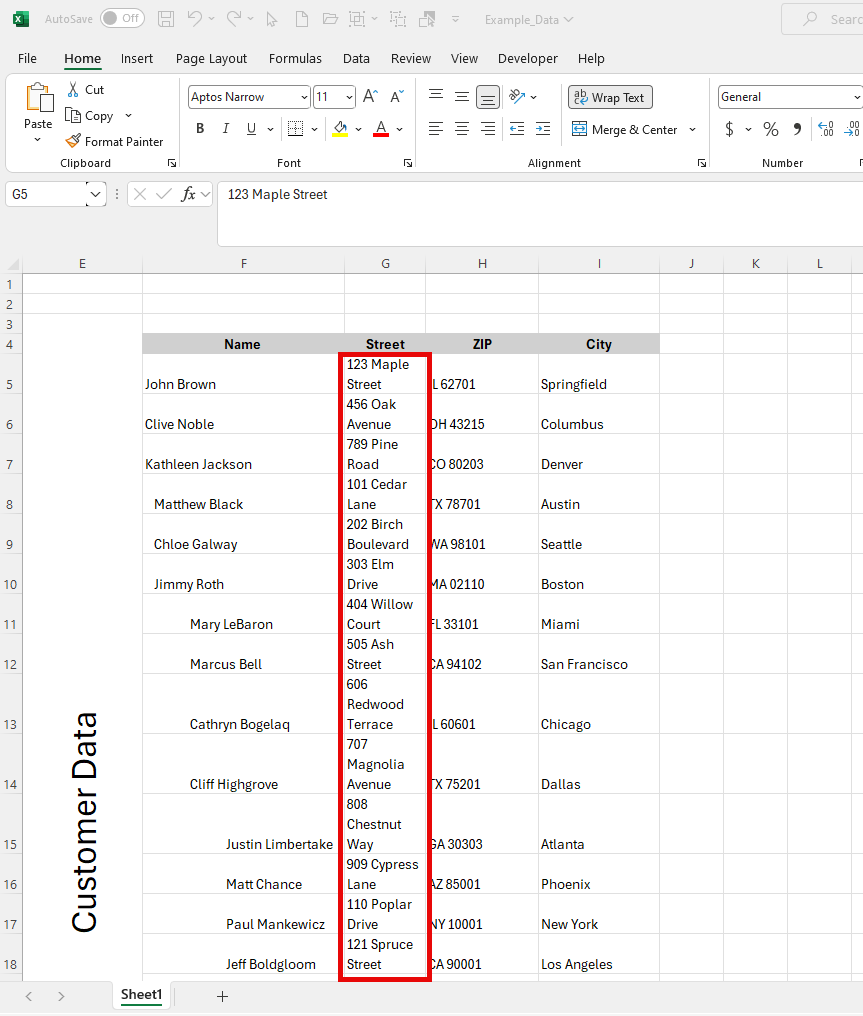
Wrapping Text
Purpose of Wrapping Text:
Depending on the size of your data sets and the width of your cells you may want to wrap the text in some columns to avoid scrolling horizontally over a wide spreadsheet.
You can wrap your text by using the “wrap text” icon. But be aware that a text wrap in one column affects the other columns as well as you can see in the example below:
Tips for Aligning Text in Spreadsheets based on Content-Type
- Numbers: Align numbers to the right, because then decimal points will line up correctly.
- Text: Should be aligned to the left for easy readability.
- Headers & Dates: Here you are free, but be consistent.
- Multi-line Text: Top align vertically with wrapped texts.
- Similar Data: Uniform alignment (same alignment across the entire worksheet).
- Merged Cells: Align text consistently and avoid uneven spacing.
- Indentation: No indentation with numeric columns. Use indentation sparingly.
- In General: Consider the overall layout, test different alignments, and preview them. Be careful with conditional formatting and alignment. Some conditional formatting might interfere with your alignment.
Shortcut Keys for Alignment
Horizontal Alignment:
- Align Left: Alt + H, then A, then L
- Align Center: Alt + H, then A, then C
- Align Right: Alt + H, then A, then R
Vertical Alignment:
- Top Align: Alt + H, then A, then T
- Middle Align: Alt + H, then A, then M
- Bottom Align: Alt + H, then A, then B
Other Useful Alignment Shortcuts:
- Indent: Alt + H, then 6 to increase indent or Alt + H, then 5 to decrease indent.
- Wrap Text: Alt + H, then W
- Merge Cells: Alt + H, then M, and then options: C (for merge & center), A (for merge across), M (for merge cells), and U (for unmerge cells).
Conclusion
Professional, informational, readable, and error-free. This is how you want to present your spreadsheets to the audience and users.
A properly done alignment and formatting is key to doing this.